
A STICKY SUBJECT: SEWING ..VS HEMMING TAPE ..VS GLUE (STICKING BADGES ON YOUR TOP or campfire blanket)
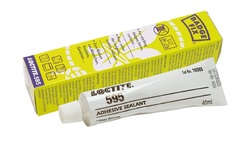
Loctite 595 (badge capable glue)
Learning to sew is a lifeskill, (& part of your home help badge too).
But many parents & carers these days don't necessarily have the skill to do this either.
Whilst sewing stitches on your badges will be the best & most permanent way of fixing badges to uniform or campfire blankets there are other options, or combinations... ;)
It's a tricky one, you want to learn a skill & do it properly but those around you might not be able to teach you.
The glue (pictured above) is available at the scouting shop (click the picture link), but is very expensive at around £5.50 per tube.
It's recommended you leave a badge to bond (dry & stick for at least 24 hours but after that is meant to be wash & tumble-drier proof afterwards (but we haven't tried it so cannot comment on it's bonding ability long-term).
Iron on Hemming tape.
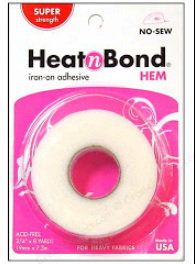
The good thing about this is it's cheap, you can pick up a reel from places such as Dunelm-mill for about £1 for a reel. (£3.00 at tesco)
It's easy to cut to shape with scissors or simply tear off the reel & stick down with a hot iron (steam setting) covered by a damp tea-towel to protect your top & other badges.
The downside, it's not very cub-proof! ..can come loose after a few washes, or completely off if you only use this to stick your badges on, HOWEVER, a quick iron (same technique again) often works to re-seal your badges onto your uniform (if simply lifting at the edges), as we are simply reactivating the glue with heat, (explaining why it may loosen up in a hot wash or in a tumble dryer).
We use this & pack lifting corners with a bit more tape before re-ironing, poking excess hemming tape under the badge with the tip of your scissors, if you don't, it will melt when the iron comes into contact with it & cause a mess!
We recommend: You use hemming tape to hold the badge firmly in place then after it's cooled apply a few small stitches in place around the edge of the badge to give it additional strength.
If using this "twin-fix" method the pressure is off you because the badge is already positioned & won't slip, & only a handful of tiny stitches are needed, so you can use a bigger & easier to control needle to push through material for the remaining work.
This method works well for a beaver or cub because the initial heat bond makes it easier to work with afterwards, without pulling the badge in all directions, & especially as you don't have to hold the badge in place, just sew around the edge, "pinning & reinforcing"
So simple, even a man can do it! ...(I did)!!!
It's a good opportunity to teach a child to use a steam iron properly & safely, ..using this technique feels less of a cheat too!
Got some old badges to use on a campfire blanket, but not sure how to make one yet?...check our page out for instructions & patterns.