
| Now we have our acorns, we need to float them in water... if they float there are grubs & insects eating away inside, but if they part sink (submerge themselves) then they are "good" It only takes a few seconds to pour them into a jug of water & take off the floaters... Dry out the good acorns with a clean tea towel & put them aside in a cool place. Now we need ziplok / clipseal bags (one for each acorn) & a good amount of fresh nutrient rich peat based compost. We wet the peat with regular water grab a small handful & gently pop an acorn into the middle. Squeeze out most of the air close off the bag, seal it & add it to a pile. You do need to tell your parents or carers about what you plan to do because you will have to nab a small corner of your fridge, so everyone in your households co-operation will be required. (we are lucky we have a small spare beer fridge so will use that). Many tree seedlings can be started in this way, not just oaks, watch the videos below to see the next stages... Do make sure a grown up is helping you, especially if you need to use a knife, or move a heavy peat bag around. It took us about 10 minutes gathering to find 140 "good" acorns when floated. Lets see what they are like in spring! |
Grow an acorn into a mighty oak, for fun, ..or simply to help the environment (Autumn project)27/9/2014
0 Comments
By Izzy M.
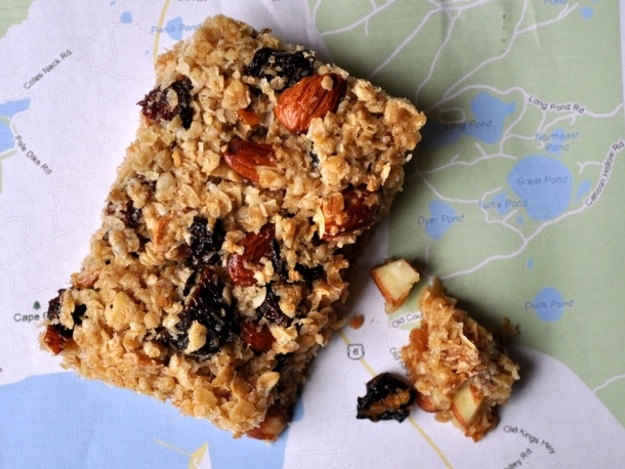
We have covered trail mix before, this gives you the option to make & bake some simple trail mix type energy treats, which we love to look for any excuse to eat! This recipe was found on one of our favourite sites to explain & indulge in both cooking & baking "Serious Eats" is a great mix of everything to do with food, wide & varied it is always tempting us, so this recipe works out cheaply compared to buying packets of pre-prepared energy bars or stodgey flapjacks, make em, bake em, ..stick em in greaseproof paper & take some along on your next big day out! ...healthy natural energy, (mainly) which will top up your energy levels (so make sure your parents & carers have one too, so they can keep up). CHEWY TRAIL MIX BARS Save Recipe About This Recipe YIELD:serves 12 ACTIVE TIME:15 minutes TOTAL TIME:45 minutes THIS RECIPE APPEARS IN:Wake and Bake: Chewy Trail Mix Bars Ingredients
By Izzy M. http://www.renewableuk.com/en/renewable-energy/wind-energy/how-it-works.cfm Have you ever wondered how a wind turbine works, & why they are so good for the environment compared to Nuclear, fracking, & typical fossil fuels? Onshore wind farms reduce CO2 emissions, provide energy security, (keeping the lights on). Research conducted by RenewableUK and the Department of Energy and Climate Change (DECC) has shown that for each installed megawatt (MW), around £100,000 stays in the community during the lifetime of a project. Onshore wind works well in the UK because of the excellent wind resource. It has also become one of the most cost effective forms of renewable energy, providing over 5,000MW of capacity. A modern 2.5MW (commercial scale) turbine, on a reasonable site, will generate 6.5 million units of electricity each year – enough to make 230 million cups of tea. Opinion polls consistently show high levels of support for onshore wind in the UK, with higher support in rural areas. In the UK, there are numerous onshore wind projects, ranging from single turbines to larger, multi-turbine schemes (see below for further details). Projects are developed by an increasingly diverse range of people, from large energy companies and independent developers, to community groups or small businesses and farms. How it Works Most wind turbines start operating at a speed of 4-5 metres per second and reach maximum power at about 15 metres per second.
This video shows what we can't see when wind turbines have been built around us.. but, the land is still useable to farm crops or cattle on (which we do a lot of in our area) , & our nearest big windmill turbine is at "G's" growers only 0.7 of a mile outside of town itself. Unlike lots of other power sources, when a wind turbine comes to the end of it's useful life, you can simply replace it using the same footprint of land, recycling the bits & pieces used to make it. Some areas of the country hve "community" wind farms, they use government money (a bit like the "Ramsey millions" to build turbines that can support their whole community with energy, & make money by selling the electricity produced back to the national grid. We know we have enough wind around Ramsey, so why don't we do this in our community? ...what do you think? 
https://blog.flubit.com/were-supporting-the-national-literacy-trust-with-book-month/
In case you hadn’t already heard, August is ‘Book Month’ here at Flubit and we’re celebrating books and supporting the great work of the National Literacy Trust. The Book Month is taking place throughout August and we’re asking book lovers nationwide to send us their very own reviews to appear on the Flubit blog. For every book review sent to [email protected], we’ll donate £10 to the National Literacy Trust and give the reviewer a free book of their choice to say thank you! “We absolutely love books here at Flubit so the idea of a Book Month made perfect sense to us. We want to get the nation reading more and it’s great that we can support and raise money for a fantastic cause at the same time. The National Literacy Trust do some amazing work and make a huge difference to thousands of people’s lives across the UK, so we’re delighted to be able to help in our own small way.”Flubit CEO, Bertie Stephens For those that prefer to Tweet rather than Blog, we’ll donate £1 for every ‘micro review’ we receiving including the hashtag #flubitbooks. Each micro review Tweet will be entered into a weekly prize draw to win a free book of the winner’s choice up to the value of £10. Anna Jones, Development Manager at the National Literacy Trust, said ‘”It’s wonderful that Flubit have chosen to raise money for us in this way. Anything that raises awareness of the importance of literacy and encourages reading for pleasure is very worthwhile. The Book Month campaign is a great way of achieving this and will provide vital support for the National Literacy Trust’s work in improving literacy in disadvantaged communities“. Book reviews can be submitted to [email protected] and more information about the initiative can be found atwww.flubit.com/books. Click here for full T&C’s 
Another good reason to get started on a campfire "badge blanket" is the new Camp craft activity badge aimed at getting beavers into camping & outdoorsman skills.
Whilst we have linked the badge (as usual) to all the requirements, they are listed below also. To achieve this badge you need to: 1. Help to put up a tent. (for a beaver this could be one of our recently acquired pop up tents which many children manage to put up ,..but many parents & carers, fail to be able to put away afterward, so we'll try to show your child popping them back into disc shape too)! 2. Collect wood and help to build a fire. 3. Cook on a fire or barbecue. (our sausage sizzles maybe? ..or under supervision with an adult at home. (for this why not check out our "bannock bread" video blog post, it is simple & cheap ...& cooked right tasty camp food)! .. it only takes a few minutes to make & around 20 minutes to bake a small loaf. 4. Learn how to tie a reef knot. (we have a brilliant interactive knot tying link) 5. Take part in a small pioneering project. (we do these at cubs & beavers regularly) 6. Start your own camp blanket. 7. Visit a Cub, Scout or Group camp. By Izzy M. This post from the early days of the blog has been newly updated, because the information was not very comprehensive in the original scouting magazine, & my dad says "you have to be confident with your kit as you are with a kitchen" ..in other words you might be able to knock up a recipe in your own kitchen with everything close to hand, but beyond that environment you can make mistakes... "Be prepared" So we "knocked up" a basic bannock today (in the kitchen) with the oven set between 193 - 200 centrigrade (that's the fahrenheit conversion you need from granny glenda's video) Then dad got me weighing & measuring ingredients into ziplok / clip-seal bags so we can make some outdoors too. & will do the same over a woodgas campstove in a pan later, then, if we are not completely bannocked out, will try the stick twist just so that I have made the recipe a few times & am confident to make it anywhere! That's why we have 3 versions on video for you. So what is Bannock bread?
It bakes quickly, & is lovely warm, perfect for mopping up fried egg yolks, bean juice or tasty bacon fat when you really need the body to convert useful energy for a hike or cold weather conditions for instance. Add honey, fruit, or seeds to make it either a sweet or savoury bread. do remember to turn it whilst cooking, & knock the bread with your knuckles to hear a hollow thud sound when it is cooked! ..then tuck in! 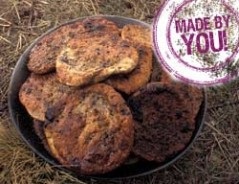 http://magazine.scouts.org.uk/skills/cooking/bannocks-camp-recipe/ Bannocks: Camp recipe Jamie Ion shares this simple and quick recipe for bannocks. Backwoods cooking has never been so delicious. Bannocks are a very simple form of bread that can be cooked on an open fire, grill or frying pan. You can create any combination you want by including fruit or nuts, but I prefer the basic bread.
Don't wait till you are hungry.. try this at home, so you are confident making it... This is why we have 3 videos, one making it over a campfire, one at home in an oven, & another making it on a stick... Same bannock bread, slightly different technique that you can have fun experimenting with, ..if you stick to the basic recipe it will be cheap to make & fill a hungry hole in your stomach! So, same recipe, but made simply in an oven at home! ..thankyou "gramma glenda"! ( Cree first nations tribal elder from Canada) ..she knows her stuff, so pay attention! I hope she does some more recipes soon! & finally, (below) Another short video of bannock recipe "strips" wound round then cooked on sticks over campfire embers! ..don't forget to pre-heat your stick to help the doughy wrap cook on the inside as well as the outside! Hope you find the 3 resource videos useful!
After watching the videos, click the badge links to see how this knowledge could help earn you one or more badges, & teach you to feed yourself at the same time! 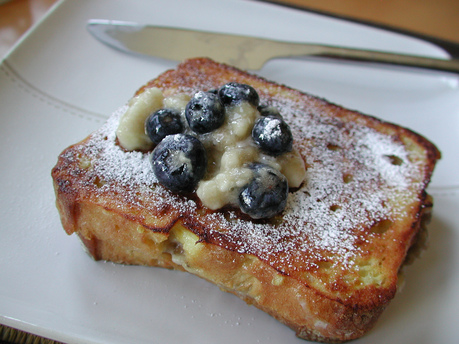 Made by Me ...Izzy M
(always have a grownup around to help you in the kitchen) I love Nutella on toast in the morning but when read the ingredients but it's packed with fat & sugar ..over 50% in fact ..which isn't good for you, now we save it for pancake fillings & sandwiches once or twice a week only. We get the "George Foreman" electric grille out & made some french toast, (which is also not very good for you! .. but hey we like to try new stuff). As I'd had eggy bread at camp recently dad thought I might like "french toast" We turn on the "George Foreman grille" & butter 2 slices of bread. Place the butter side down on the hot grille.. butter the top side (lightly) with more butter... Let it cook off for a few minutes, the butter will be absorbed by the bread making it lightly fried / grilled. when it looks nice & brown, & not floppy take it off the grille. Butter the toasted bread LIGHTLY ..last time I promise ( Izzy's Dad) Sprinkle 1 even teaspoon of vanilla sugar or cinnamon sugar per slice (tap the hand to spread it evenly don't shake it or you'll use far too much sugar with far too little slice coverage)! Vanilla sugar & cinnamon is also really nice on porridge if you fancy a healthier breakfast.... Or top it off with fruit, sliced banana, strawberries, blueberries, blackberries or some syrup. In the picture you can see blueberries & some compote, with a dusting of fine sugar. & you can get vanilla sugar from cubs & beavers as part of our fundraiser! Why not try it!? ..After all "cubs can cook" 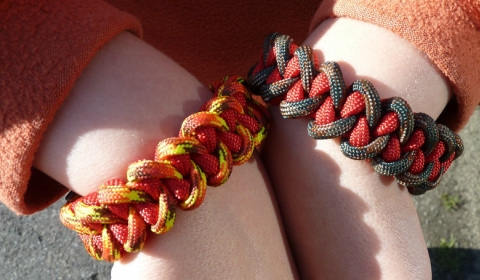 Sharks-tooth design "550 paracord" ..made by me! If you can loom band you can para-cord yourself a longer lasting useful item!  by Izzy M. Not a food recipe today, ..but I have been caught up in making "loom" bracelets. I was given a bracelet by a classmate, & decided i'd like to try making one myself. An hour later i'd worked out one of the harder loom weaves, made dad a bracelet & he said, "Hang on, if you can do these so well you will find making paracord bracelets really easy, why not make some & perhaps sell them" ? SO that's what we might try to do. In the meantime, why not have a go at loom bracelets, ...you never know they might go towards earning you a badge. So speak to your pack leader to find out, or check out the badge requirements pages! Looms are available cheaply from many places, & from different brands, (such as ozzbozz). Here is a link to LOTS of designs & how to videos... hope you enjoy them. & to show you how similar paracord is to use why not watch this video. (I think paracord bracelets are actually easier than loom bracelets, but you need an adult helping you because of the need to use a disposable lighter)
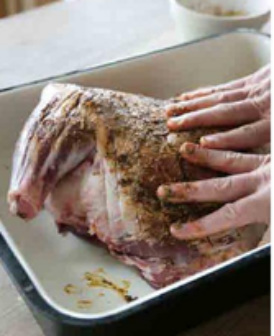 By Izzy M. My dad made this for me first & then told me after I'd tasted the mass of flavours that it was as easy to make as a pork roast with good crackling. As i'm good at that I thought i'd have a go, but asked dad to double up the spices because they are SO tasty. We grabbed all the ingredients & not having a pestle & mortar to hand (dad was using it elsewhere) popped them in a clip-seal bag & bashed it until it was a lovely dry mix. Then we added a glug of olive oil in the bag & mixed it up some more, sealing it up afterwards while we popped our lamb in a large oven tray Again the recipe is from our Hugh Fearnley Whittingstall recipe book "River Cottage Everyday" which is full of simple & interesting cooking recipes, like my dad says Lamb done this way makes simply cooked vegetables a pleasure Prep time
Cook Time
Servings
Ingredients (for regular strength spice, such as someone who doesn't like currys beyond a "korma" strength) 1 shoulder of mature lamb, mutton or hogget, on the bone
Directions If you have time, toast the cumin, coriander, fennel seeds, cinnamon and peppercorns in a dry frying pan over a medium heat for a minute or so, until fragrant (this boosts the flavour but isn’t essential). Crush to a coarse powder using a pestle and mortar, then combine with the cayenne or chilli powder, paprika, garlic, rosemary, salt and olive oil. (With a grownup Lightly score the skin of the meat with a sharp knife, making shallow slashes just a few millimetres deep and 1–2cm apart. Rub half the spice paste all over the lamb shoulder, underneath as well as on top, and especially into the cuts. Put into a large roasting tin and place in an oven preheated to 220C/Gas Mark 7. Roast for 30 minutes. Remove from the oven and rub the remaining spice paste over the meat using the back of a wooden spoon. Pour a glass of water into the tin (not over the meat), cover with foil and return to the oven. Reduce the heat to 120C/Gas Mark ½ and cook for 6 hours, or until the meat is very tender and falling off the bone. You can add another glass of water halfway through, to keep the pan juices ticking along. Transfer the lamb to a warm serving plate. Skim the excess fat off the juices in the tin. Tear the meat into thick shreds and serve with the juices spooned over. Simple accompaniments are all you need: boiled new potatoes (in summer) or some roasted squash (in winter) and a dish of shredded cabbage, greens or kale would be ideal.  still with the old date on the graphic! still with the old date on the graphic! The date(s) over a weekend are set for OCTOBER 2014
See our own page explaining what they are & whether you wish to attend as a family HERE ..if you don't want to attend you still receive your badges earnt. i.Achieve - Top Awards… 2014 When: 11/10/14 & 12/10/14 (Daytime sessions - approx 1½ - 2 hours) Where: Comberton Village College, Comberton, Cambridge To recognise the successes and achievements of young people in Cambridgeshire gaining top awards as they progress through Scouting, we will be hosting the “i.Achieve - Top Awards…event, at Comberton Village College (Cambridge), over the weekend of 11th/12th October 2014. This event will be youth led, run by adults and young people from the Youth Involvement (YIPEE!) team within the County. It is open to all youth members who have gained any of the following youth awards, from 1st January 2013 to 31st August 2014: Chief Scout’s Bronze, Silver, Gold, Platinum or Diamond awards; DofE Bronze, Silver or Gold awards. It will also be a chance for families and local scout Groups & Districts to join in celebrating the achievements of their young people. Further details of how to register award recipients online will be available shortly. Keep a check on ShoutOut! and the County website for the latest information on this event. Made by me, scotch pancakes, for eating & freezing anytime you fancy! (great @camp great @home)30/5/2014 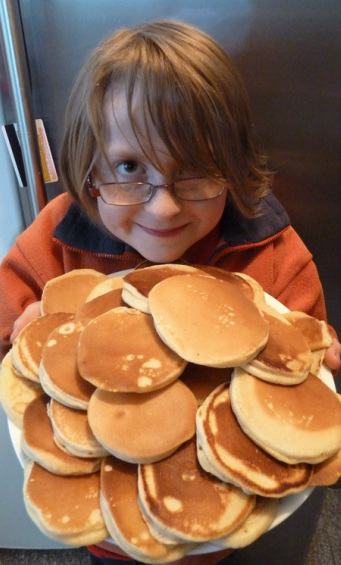 What we don't eat will go in the freezer for breakfasts & desserts. What we don't eat will go in the freezer for breakfasts & desserts. By Izzy M. Always have an adult helping you in the kitchen, it keeps you safer & it's fun to cook together! I love scotch pancakes (drop scones or, american pancakes if you like) & we used to often have a packet in the freezer ready for a school day breakfast treat, we'd buy them & freeze them when they were discounted in the supermarket. Dad said that really we were being lazy, because they are simple to make. He said the pancake pan needed to stretch its legs & that he reckoned we could possibly make 4x the amount for the same as a single packet bought in the shops. The recipe we used is from Hugh Fearnley Whittingstall's "River Cottage every day" cookbook, click the picture above & it will take you to the recipe page. Dad spoils me & lets me have home-made vanilla sugar, or maple syrup or butterscotch sauce or golden syrup on top, with whipped cream sprinkles... sometimes with a sliced banana so it "looks" a bit healthier. This is a great camp breakfast food to make too, lots of energy but quick & simple, for kids like me, sweet toppings, but for adults this can be eaten as part of a camp fried breakfast, with bacon or sausage. The great thing about this recipe is that it makes around 30 which once cool can be placed in a tupperware type box with baking paper between each layer s they don't stick together, then when you fancy a few get them out of the freezer, pop a few in the microwave for a minute or more & make yourself a quick treat, it's a great way to start any day, not just shrove Tuesday, & makes a nice change from eating the same old boring breakfast cereal. A typical kid like me would have 4 or 5 as a good serving. INGREDIENTS
METHOD How to make wholemeal drop scones / scotch pancakes 1. Sift the flour, baking powder and salt into a large bowl and stir in the sugar. Make a well in the centre and break in the eggs. Pour in about half the milk. Whisk, gently at first, and then as you start to get a thick paste, add more milk and the melted butter. Beat until you get a creamy batter a little thicker than double cream - you might not need all the milk. 2. Put a large, heavy-based frying pan or a flat griddle over a medium/high heat. Add a few drops of oil and rub with a thick wad of kitchen paper to oil the pan very lightly. Pour (or 'drop') a scant tablespoon of batter into the pan - to get a disc about the size of a digestive biscuit; you should be able to fit 4 or 5 in the pan. 3. After about a minute, little bubbles will start to appear on the surface of the drop scones. As soon as they cover the surface, flip the scones over with a spatula - be warned, the first batch may stick. Cook the other side for 40-60 seconds or so, then transfer the drop scones to a warm plate and cover them with a clean tea towel so they stay soft - or hand them over to those waiting eagerly to get stuck in. 4. Cook the remaining drop scones in the same way, adjusting the heat level if they start browning too quickly and re-oiling the pan with kitchen paper as necessary. To serve, top with a little butter and sprinkle with some sugar, and a fine dusting of cinnamon, if you like. Or serve buttered and spread with jam, honey or macerated fruit. Eat quickly, while still hot. (Please can we have these on our next camp)!? If you don't want sweet pancakes miss out the sugar &, cook off some rashers of crispy bacon first then chop it up & add it into the batter mix along with some finely grated cheddar cheese... & a few twists of black pepper, ...mmm!
 A basic guide for adults... "& those who Scout". 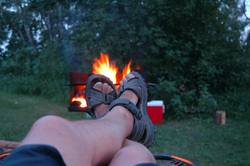
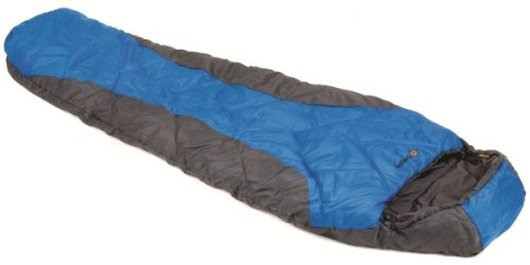 Affordable: Snugpak Laponie kids 2 season bag (a proper starter sleeping bag). Affordable: Snugpak Laponie kids 2 season bag (a proper starter sleeping bag). By Web Admin We have a quite extensive section dedicated to kit & camping, with a page on sleeping bag technical know-how. HERE & a few basic camp items you might have seen & pondered over HERE A good "warm & comfy" nights sleep will make or break your enjoyment of camping & severely up (or limit) your energy levels & safety when outdoors for the duration of any trip, ..so please refer to our sleeping bag guide & recommended kit pages. We'll start with a big no no: "mountain warehouse" ...some of the worst gear i've come across with very limited knowledge (ever been marooned based on poor advice)? & some horrific tales of kit failing in the field. The old phrase "you pay your money & take your pick" (or gamble & probably lose) may well apply. Source kit from well proven manufacturers , who are often geared up to deal with little people. ..it's often not that expensive after a bit of research compared with staying at home to look after a child who caught a chill from a poor quality sleeping bag! The other thing to avoid in camping is the salesperson who say's "they'll grow into it" ..kit needs to fit from the word go, sleeping bags can be stuffed with clothing to reduce the amount of free air which will need warming & reflecting, but only so far). young Kids typically don't sweat, to the degree of teens & adults, so sleeping bags are ok to sell on provided you wash them properly rather than bung them through the washer a you would your normal clothes, In a word DON'T ONE TO AVOID I cannot recommend Mountain warehouse stores at all, having been in looked at stitching, materials, store staff keener to sell you anything with little clue as to the outdoors, website lacking in proper specs in the recent past! ..nor have I seen any recommendations for their kit on scouting forums. 2 season minimum for sleeping bags, & extra warmth from knowledge & experience in part supplied by you the parents & carers, a lot of fun can be had from making a decent campfire blanket providing lots of extra warmth in or out of a sleeping bag, so do consider making one, we have lots of instructions for different styles here on the site, which receives thousands of hits per month as a source of material & guide no matter what your level of ability is! I would recommend you read the sleeping bag guide as a start point & work that knowledge into your research, as a parent I was very alarmed to see at a recent weekend camp near a river children turning up with a duvet & pillow (not from our pack thankfully), & anticipate that whilst they will still have had fun, their energy would be lower than their friends based on quality of sleep (if any) gnawing cold even in summer months, & moisture absorption based on the materials inability to wick or repel moisture, dew & mist from the field early morning anyone!? Don't chance it, some equipment might be available to borrow if leaders know early enough there is a problem! 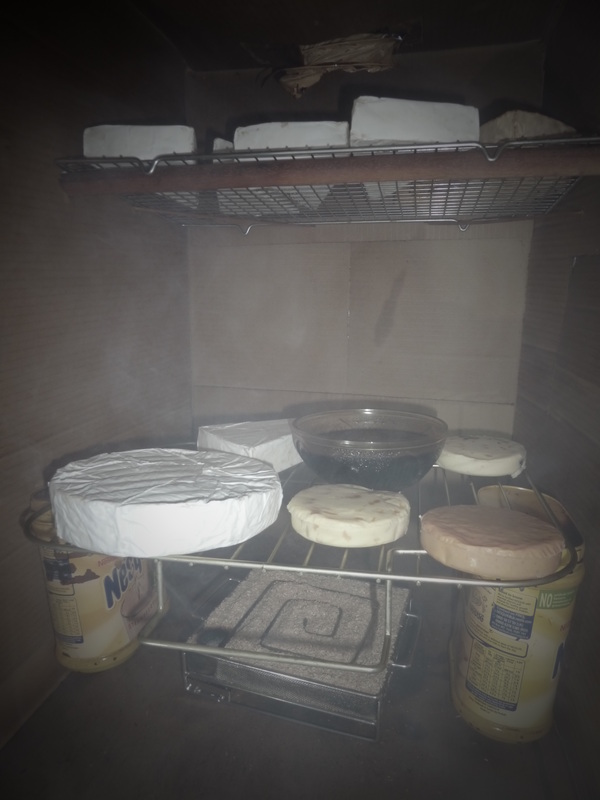 Smoking chamber made from 100% recycled FREE stuff! Smoking chamber made from 100% recycled FREE stuff! By Izzy M. Always have an adult helping you with any project, to keep you safe. Especially with projects like this where cutting tools such as scissors or a knife are needed, not to mention the fact that we use matches to light the sawdust. I've been meaning to post this for a while! (everytime we open the fridge door I remember I need to blog this). I've already posted a picture of some finished cheese we smoked, but you never got to see the inside of our first smoker, ..home-made of course. I expect you can see the empty Nesquik containers keeping the lower shelf steady? OR the cooling racks "borrowed" from the kitchen? & the new tumble-drier heat vent hose which lets the smoke escape safely & out through a window? Or the wooden dowel holding up the top rack? (you can't see the bamboo skewers at the back, there are 2 of them holding lots of cheese up! Or the fact that the smoke cabinet is in fact a cardboard crisp box (quavers multipack of 30)!!!? from our local supermarket. Yup, we made it on the cheap as a project to smoke cheese & fish ages ago. Dad said that if we hadn't had the new tumble drier hose around then we would have simply made a chimney to the outside from something else, such as pringles cans with the bottom taken out & gaffer taped together & cut to point the smoke outside with angle cuts. In other words, EVERYTHING was recycled from somewhere else, & it cost exactly £0.00 to make. the dowel (wooden rod) was strong enough to hold fresh salmon from & smoke it hanging top to tail, but in the picture we are smoking salt, soy sauce & lots of cheese. Smoking food preserves it (making it safe to eat for longer) as well as adding a nice smokey flavour depending on how long you let it sit & smoulder for. We use proper "deli" food safe sawdust, often beech & oak dust from a proper supplier so we know it hasn't got nasty chainsaw oils or swept up from the floor. If you have a bbq you could try cold smoking cheese (but not in the middle of summer) when the temperature is low, we use a special smoke maze (cold smoke generator) from mac's BBQ, & around 10-12 hours burn time costs us about 14p per smoking session. If you were smoking food in the wild you would make a wigwam shape enclosure to keep the smoke inside (made with long green stalky plants & grasses, but making it our way this is simple, cheap & tidy, & might earn you a skills badge! Why not make a food smoking box from recycled items? ..hint, it's got to support the weight of food & not leak smoke, so you will have to seal any door with tape, or tie it shut, & seal any holes you make for the food supports. simple engineering, but a challenge to find the best materials for free! My dad has said that if we make a project of it at cubs then we could use our 2 cold smoke generators & sawdust, to test them out with & smoke some edam or cheddar, if we are careful & look after them! what do you think? see HERE for mac's guide to how we did it!
 Lots of lovely olive oil, now with added flavour! Lots of lovely olive oil, now with added flavour! By Izzy M.
Wash your hands well & make sure all ingredients & work surfaces are as clean as they can be! ..get a grown up to help whenever you are working in the kitchen. My dad often springs surprises on me when I come back from school, or if the weather is bad, for us to do & make "stuff" This time he said that as I make the best pork crackling on a pork roast, (see other "made by me's" in the site search box) we ought to make flavoured oil to get more flavour & enjoyment out of food we love. It couldn't be easier & only takes a few minutes, plus a little time in the cupboard before you use it first time. Dad saves balsamic vinegar bottles with a crafty eye to re-using & recycling some, so he had previously washed & sterilised (in the oven after baking some bread) the bottles we were about to use. When they were cool we simply looked at what was around, ..some fresh rosemary from a 10p herb plant, cut gently with scissors, rinsed it under tap water & gently dried it by shaking off the excess water & patting it dry with kitchen paper & popped into one of the bottles, then filled with olive oil & the cap replaced or use a cork stopper to seal it before placing it back on the shelf to "infuse" ..meaning allowing the ingredients to combine & share their flavours. We did the same with some wine vinegar, just because we had some... Then we peeled & crushed some of dads smoked garlic (any real garlic cloves will do) & again popped it in with another top up of olive oil. NOTE: you will probably use fresh bulb garlic which needs to be peeled then cleaned thoroughly , & dried properly, failing to clean foodstuffs could make you sick, our smoked garlic is safer because smoke kills bacteria, another reason to use properly sterilised jars is to limit the amount of bacteria getting into ANY food, don't ever take chances, do it properly, because anything that has been grown in soil for instance has lots of microbes present, especially vegetables like garlic, Clean & dry properly, overnight if necessary! ...safety first! TIP you don't need the most expensive olive oil in a shop when you make flavoured oils, this is because we want the flavour of the added ingredient (the rosemary OR the garlic) to be the biggest flavour in the bottle. Rosemary, when stuffed into the bottle takes a minimum of 14 days to start to change the flavour of the olive oil, but leaving it longer means MORE flavour.... The crushed garlic (or thinly sliced if you dont have a garlic crusher, will only take a few days to really start tasting garlicy, but again the longer you leave it (shake the bottles to mix it up) the more rich in flavour the olive oil becomes. You can do this with whole or halved chilli's if you see them cheap on a late night supermarket hunt, & it's a great way of using up food that might otherwise go in the bin. ..especially good for parents & carers who like their pizza or pasta with a bit of heat! Because we cook alot we will have several litres of olive oil in our cupboard, which isn't typical, so we have also found this handy link which compares some popular olive oils & their prices ...we like finding a bargain & have used a few of the brands, but common sense says if you are going to change the flavour of olive oil as much as we do, buy the cheapest, ..that was Lidl (a German company with supermarkets over here) See the results HERE SO if you wanted to make some small bottles to try out or as a present for someone (because if bought from a shop flavoured oils can be REALLY expensive) ..then Lidls £1.99 for 750ml could make you three small bottles or several larger ones. Flavoured olive oil can really help with the end result of your food (or whilst cooking) ,try to keep it in a dark cupboard afterwards, & no you don't have to remove the rosemary sprigs or other flavouring ingredients, though you can remove the sprigs if you like, but they simply keep adding extra flavour the longer they sit, we pour straight from the bottle, but you could strain it through into smaller & prettier looking bottles if you need to. Total time making this!? 10 minutes ...easy! No special storage required, back of the cupboard. use sparingly on meats prior to roasting, or as a drizzle for pizza toppings. Be adventurous, be a food explorer & try it on new potatoes to be roasted off in the oven. A really handy cooking ingredient to have around. Because "Cubs CAN cook" Our costs for this were. £0.10p for the "reduced price" fresh rosemary plant (still growing) using 2-3 sprigs per large 750ml bottle. £0.00p our bottles were recycled, (dark bottles are better for storing), so even a clean & sterilised beer bottle could be used with a cork that fits. £0.40p for a garlic bulb from which we used 3 clove portions for a full large bottle of olive oil. ..the rest was used for cooking. £1.99 for 750 ml of Lidl Olive oil (that's a lot of olive oil) which you could use for 3 smaller 250ml bottles of different flavoured olive oil. Make as much or as little as you want but fill each of your bottles so there is minimal air at the top, enough space to shake & "infuse" your ingredients occasionally. plenty of herbs can be used in the same way to produce different flavoured cooking oils which work well at home or on the bbq, or at camp, so give it a go! ..it doesn't get simpler than this.  By site Admin
Our Scout badge page is BACK ONLINE having undergone an overhaul* having been removed from the pages whilst linked badge pictures & requirements are set in place. *To make it as easy to navigate as the beavers & cub badges Sorry for any inconvenience. Our badges pages are easier to navigate than uk scouting associations own layout, (& there are a heck of a lot of badges) hopefully making the site far more useful to those who are moving on to scouts & beyond!  Rainbow salad wrap SERVES 6 30 minutes PREP TIME... This is colourful, seriously tasty and fun to make. Feel free to use other firm fruit and vegetables that are in season where you live, or leave out the wraps and eat it as a salad, if you prefer. JAMIE OLIVER’S LIVE COOKING LESSON To celebrate this year’s Food Revolution Day, Jamie will be leading the biggest-ever live cooking lesson and he wants you to join in, wherever you are in the world. You’ll learn to make his tasty, nutritious rainbow salad wrap, especially chosen with kids in mind, so that everyone can get involved. To help us achieve our goal, we’ve teamed up the educational group, Times Education Supplement (TES), who’ll be streaming Jamie’s live cooking lesson to schools across the world. We want to get one million kids cooking on the big day and, with your help, we can make this happen! Wherever you are in the world, tune in live or watch his pre-recorded video on 16 May – you have no excuse to miss it! 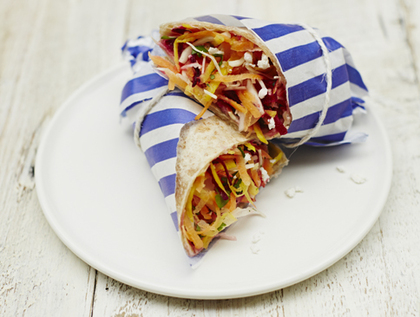 You will need
Ingredients
JAMIE'S TOP TIP: Remember that box graters are very sharp so use them carefully. Hold hard fruit and vegetables with a firm grip and use nice big chunks so that your hands are safely out of the way. When your knuckles get too close to the grater, stop grating and discard the leftovers. lET'S GET TO WORK ...COOKING METHODOLOGY 101Method
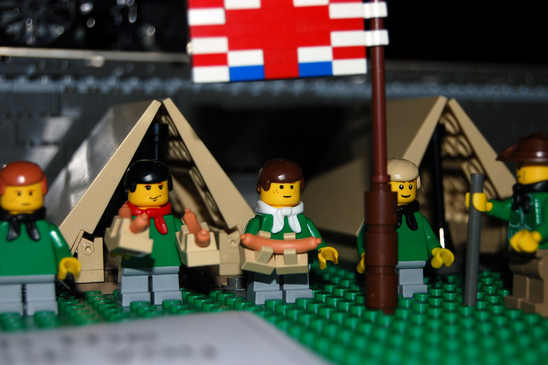
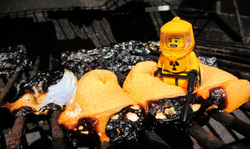 Tonight we spent time in the HQ hut setting out a "storyboard" for a stop motion movie we will be making as part of our badge work, not to mention it's simple to do either on your own, or in a group. We'll dig out our stop frame animation blog posts & stick them here, here & here as the chances are it will be something your cub or beaver would enjoy trying out in there own time as well. We already have one very famous Scout based in Scotland by the name of Morgan Spence who has been using Lego for his animations for many years now, we've put links to his work in the past & will take this opportunity to link to his latest piece of interactive video created for the International Red Cross (disaster relief) Give it a go, ..make choices when prompted! Morgan also gives some help with his " how to animate" page (linked) ..worth a look for budding short film makers.
 The latest issue of things to do (& things to GLUE) ..in a digital page turning format, just click the pictures to read the magazines... Projects aplenty, whether going for a badge or simply bored & fancy trying something different "Get Active" is full of ideas..  Our get active magazine, ...which is about exercising your brain as well as your muscles!  Instant Scouting, full of great projects from some of our badge sponsors.
 Lets ask caroline @Minifigs.me for the new badges (tee-hee) Lets ask caroline @Minifigs.me for the new badges (tee-hee) Hey Cubs, you haven't been left out! ..there are FIVE new badges for you to have a go (or not) at earning... Until we re-organise our badges pages ALL the new CUB badges (as of April 2014) are here! ..simply CLICK the badge you are interested in & a new window will open taking you to the badge requirements... Page now updated.... (phew, that was quick)!
 Just how many badges can you fit on a minifigs.me beavers arm? Just how many badges can you fit on a minifigs.me beavers arm? While we take a bit of time to re-shuffle our badges page they'll all sit here for you to take a look at! ...as usual clicking on a badge will open a new window with all the requirements for that badge. BEAVERS! ..badges page now updated!
 BEAVERS: Time on the Water Staged Activity Badge 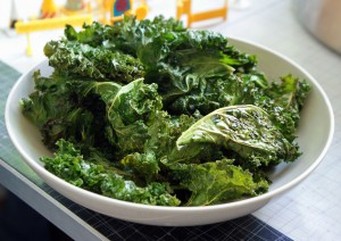 By Izzy M. Remember to wash your hands really well, ovens are hot & the tray will be too! ..so make sure you have an adult helping you in the kitchen. Kale is a superfood, ..kale often gets left in the salad crisper section of the fridge & thrown out (sadly), or simply given to pet rabbits & guinea pigs! However try this experiment as an alternative to crisps, ..they are strangely different but they taste so good! (a bit like my dad's addiction to cheesey doritos) To make kale crisps, tear kale into bite-sized pieces (make sure it’s dry or it won’t crisp up) (you can use kitchen scissors to simply cut the leaf away from the stalk). Toss about in some rapeseed oil/ canola (in america) / olive oil, sprinkle with salt and roast until crispy. When golden they smell like popcorn, but taste like nutty crisps, shattering in your mouth, with none of the tough chew I generally associate with kale. Now when mum mentions Kale, my eyes pop with pleasure ..I buy a bunch every chance I get, and most often it’s turned into a batch of crisps I can easily eat by myself. They're not strong enough to be dipped, but their ruffled edges make them an appealing looking bowlful of salty snack. Try them – I now look forward to eating more greens when they can be turned into something this tasty! 1 bunch kale rapeseed oil or olive oil, for cooking good-quality coarse salt Preheat the oven to 400°F. Wash kale and dry it in a salad spinner or between tea towels. (Extra moisture will keep them from getting nice and crispy.) ..so really pay attention t o getting it dry. Cut or pull out the tough stems, tear the leaves into crisp sized pieces and spread out on a baking tray which is lined with oven proof baking paper. Get an adult to help you drizzle with oil and toss with your hands to coat well; arrange in a single layer and sprinkle with salt. Roast for about 10 minutes, until crispy and starting to turn brown on the edges, but not too dark. Serve & eat immediately or cool completely and store in an airtight container until ready to serve later the same day. Serves 4. Great for eating whilst having a home cinema night in with your family!
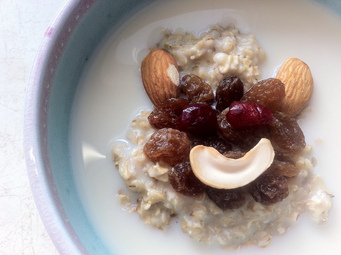 I like to drown my porridge monster in milk! I like to drown my porridge monster in milk! By Izzy M. I've never eaten "Ready_Brek", I doubt I ever will, because we don't need another box of cereal in the cupboard when we use so many oats in our day to day food, besides Dad gets cross & mutters that it's like dust sweepings & isn't proper porridge just gruel like Oliver Twist would have eaten. (Coming from a Scottish family "ready brek" is a very rude word in our house). Dad recently told me that we mess up our bodies by actually eating the wrong food at the wrong time, this is so true of camp food or a school day, when you should "eat like a king" ..for breakfast to turn you into a "can do" superhero with plenty of energy to spare. I actually get pretty excited when dad asks me "shall we have porridge tomorrow for breakfast" !? ..which may sound a bit crazy, but it's so simple especially when made in advance (& easier now because a microwave oven finishes it off very quickly). The secret, is very simple, make it the day before, (well not quite). Perfect porridge is simple, ditch the ready-brek & experiment, if you can make yourself a milkshake you can make this, & you'll want to eat more oats more often. Dad asks me after school the day before if I'd like porridge the next morning so it tastes better, anything between 12 & 18 hours is best we think up to a whole 24 hours ahead for maximum creaminess Don't put metal (such as spoons in the microwave, & have some oven mitts ready in case your bowl is hot from cooking your oats, get an adult to help you.
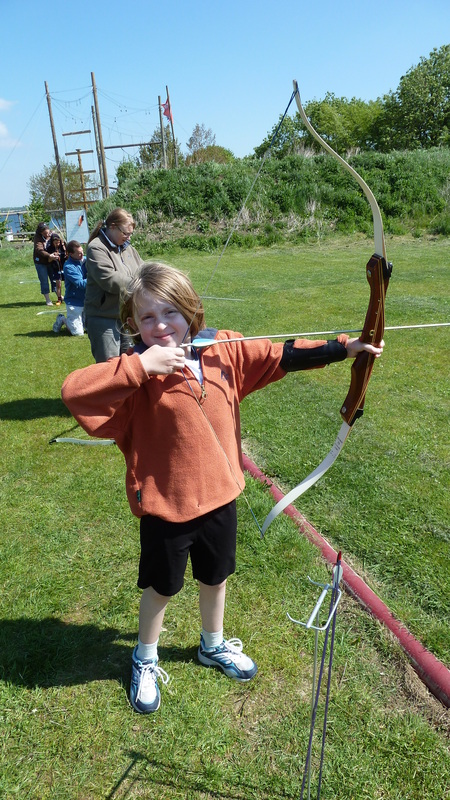
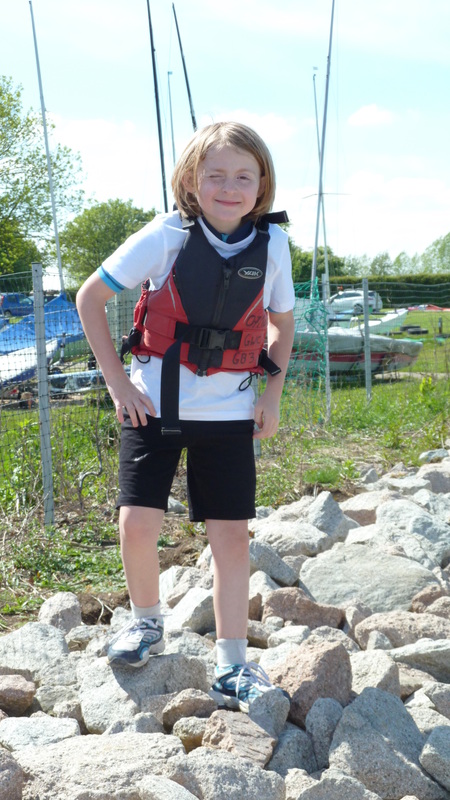
There you have it simple, creamy porridge, because the oats weren't rushed to make them good, so don't rush eating them! ....enjoy your food, oats release energy steadily & fill you up, so you might find yourself less hungry than usual, good if you are training & watching your weight, or just want to succeed in eating a bit more healthily (without grown up's nagging). If making it at camp it can be made on a stove, just more slowly, but still after a long soak, have a look at your trail mix, you might have a perfect topping to make it more interesting & boost your power! 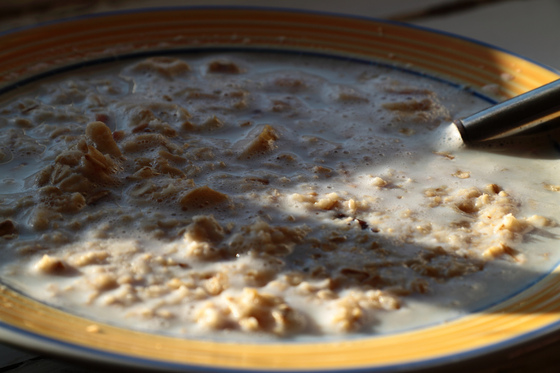  By Izzy M. (NB. Grafham water is not affiliated with 1stRamsey scouting) use the search box to find more on "Grafham" 9.30am -5.30pm but get there really early to park up (8.30a.m) and beat the queues (then you can start the cheap taster sessions straight away). There is NO pre-booking! You have to sign up & pay for the courses you wish to do (they are all close together so not hard to dart from one to the other). Well worth doing, it has proven incredibly popular & is a fantastic chance to have a cheap day of adventuring with your family or with them watching... & a perfect opportunity to get a badge or two started (or completed). children 5 & under were free in 2013, but do check with Grafham before you go! NOTE It's not clear whether this will be a one off this year or carry on as before, ...I was typically doing 6 activities (with some repeats for the ones she really enjoyed) ..dry activities in the morning wet activities in the afternoon (for example) as you don't want to keep getting changed, may as well get wet (ish) for just one part of the day. If the weather is looking good it's definitely worth taking a picnic or a portable barbecue, plenty of space to play along with raised seating & tables on the decking accessing the main building. Archery, climbing, high ropes, blind trust trail, Canadian Kayaks (the open Indian style canoes), Power-boating, sailing, ... & more indoor rock-wall climbing are all achievable in a day & many count toward BADGES! It is typically a fantastic family day, & had a barbecue (£2.50 in 2013) & endless cups of tea for 50p (with free re-fills). It was a bargain day out (free-parking too) & will be happening again in a few weeks time, it would be good to see some more Beavers & cubs there hopefully. Even if you only wanted to do a few things or just to get some fresh air with the family dog, on your bike or a walk, Grafham is super fun to go to on a warm day. As a result of last year I'm now doing archery as a hobby, (we haven't got room for another speedboat on the drive)! I'd never climbed before last year in a harness & rope, it can be a bit scarey at first BUT it's great fun seeing just how far you can get knowing it's safe to go high & aim for the top of the platform, it challenges you , might scare you (a bit) whilst you get your head into adventure mode ..& then you are really proud of what you can achieve! Why not take a look at a badge page (click the badge you are interested in & it will open a link with what you need to do to earn it)! Suggested as achievable for Beavers...
Suggested as easily achievable for Cubs... (below)
If you are nearly ready to move on into Cubs or up to Scouts then you can't unless you have all your Challenge badges, in order to earn your Bronze or silver badge, so a day at Grafham can really help speed you up on your badge requirements whilst having a whole lot of cheap fun! Talk to your leader about what you can do to earn your badges they will have some advice & might be able to help you with what you can work towards.
You will sleep like a log afterwards, don't forget to take some "wet-shoes" or a spare pair of trainers in case you want to do water activities or just dip your toes in the water to cool off under adult supervision.
There are drink & snack machines at Grafham, all taster sessions are by the Grafham team (all qualified instructors) ..this is not a Scouting endorsed event but is very worthwhile going to for a great day out & we highly recommend it! Hope to see you there. 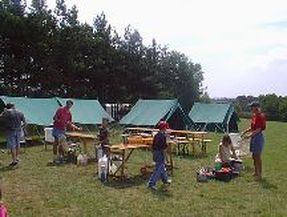 When: Friday evening 27th, ----- Sunday 29th June Where: "Lesley Sell Scouting Activity Centre" (on the road to Bedford) HERE How Much? : £30 Friday from 6pm finishing Sunday @3pm
The caving system consists of multiple different challenges along the experience. You will have to climb a climbing wall, crawl through a spider’s web, breath in at the narrowing walls and our favourite, the pod of foam! All theses challenges make for an even greater adventure To top it all off you will have to navigate the system in the dark! The above ground, multi pod caving experience is open to all groups bridging the activity gap for beavers!! This is a must do activity when visiting LSAC and an opportunity that cant be passed up! & of course the usual, good food, late nights, campfire sing songs, stories & skits... room to run, or roam (safely) wide games & wide open spaces Too good to miss! If you would like to join us at Bromham camp (a great site) please fill in the form which came home with your cub, return it with a deposit of £10 by the 25th April, the balance of £20 must be paid by 31st of May 2014. (you can pay all at once or in small amounts, speak to Akela Judith). This will be a BIG camp involving most of the Cambs district, so places are limited. PLUS ...nights away at camp go toward your camp badge, & there may well be a camp badge available for your camp blanket! ... not got one? get making it! HERE  Nights Away Staged Activity Badge |
Categories.
All
Author.1st Ramsey Scout Assoc (collectively) ...News, events & general silliness "Ahem" Archives.
July 2016
|


 RSS Feed